
Nothing sucks the energy out of a conference room faster than a lack of windows and poor air circulation. Large bright windows and comfortable facilities allow people to work to their full potential in a productive environment.
If you have graphic recording, it’s also important to effectively display the graphic recordings so participants engage with the visuals and have a deeper discussion. At multi-day meetings, it’s powerful to walk into a room on day two and see yesterday’s work on the walls. It sets an immediate tone and productive environment for the rest of the session and prompts participants to reflect on the work — this is crucial in making new discoveries and sharing ideas openly.
Prior to a meeting, go over your display options: How much wall space do we have? Can we build reflection time into the agenda? How do we want to engage participants?
Below are five effective ways of displaying graphic recordings and getting people engaged in the visuals.
1. Enrich the Meeting Space
Displaying the graphic recordings in the meeting space itself is one of the most effective ways to ensure the visuals are part of the ongoing discussion. People will naturally refer back to what was said — the graphic recordings serve as a tangible record in full view of everyone.
Alternatively, hang the graphic recordings near the snacks and coffee refills. The visuals will prompt people to stop and reflect and discuss the work with their fellow participants.
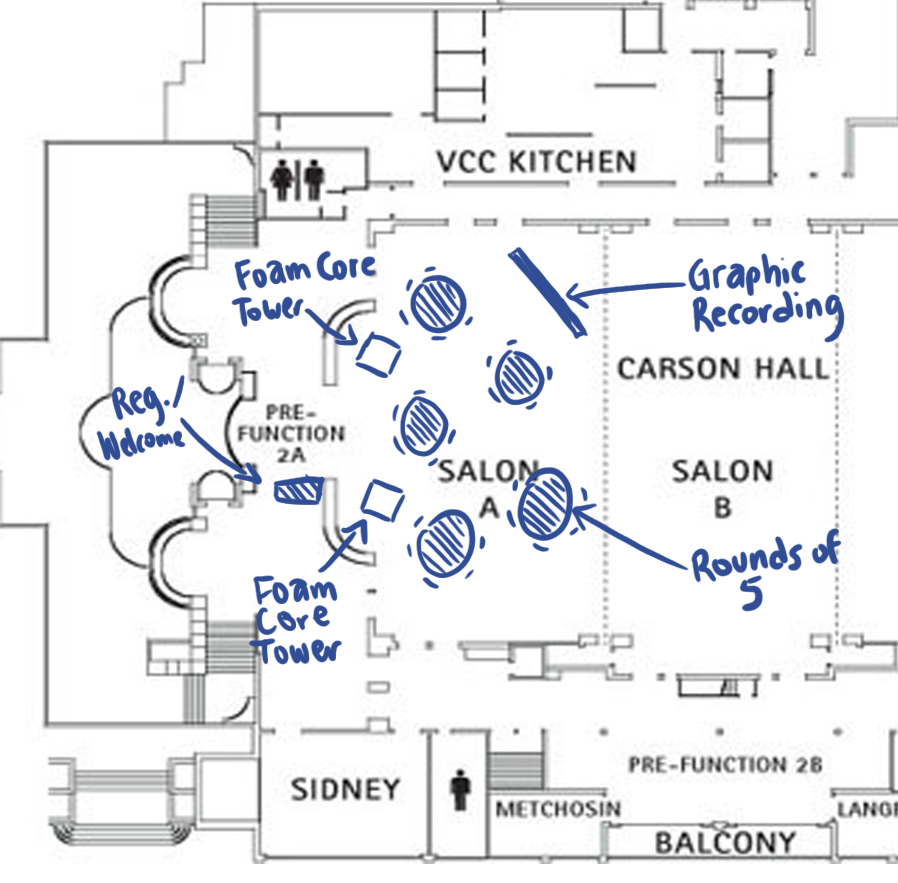
Planning the layout for graphic recording prior to a conference.
2. Graphics Tunnel
If wall space is limited in the meeting room, make use of the walls leading into the room. Better yet, if there is a hall leading into the room, create a “graphics tunnel” that participants walk through into the meeting space. This is an effective way to refocus when coming back from a break or lunch. Allowing just five minutes of quiet time in the agenda so people can do a graphics walk will ensure everyone enters the room with the content top of mind.

Mock up of graphics tunnel for a recent conference
3. 3D Towers
Foam core (or falcon board for the environmentally friendly!) is effective when wall space is limited. Graphic recording can be done directly on foam core, which can be built into “towers” of graphics, be arranged up staircases or as building blocks that represent a foundation of something larger. Seeing the work in another dimension really helps open people’s minds to new points of view.

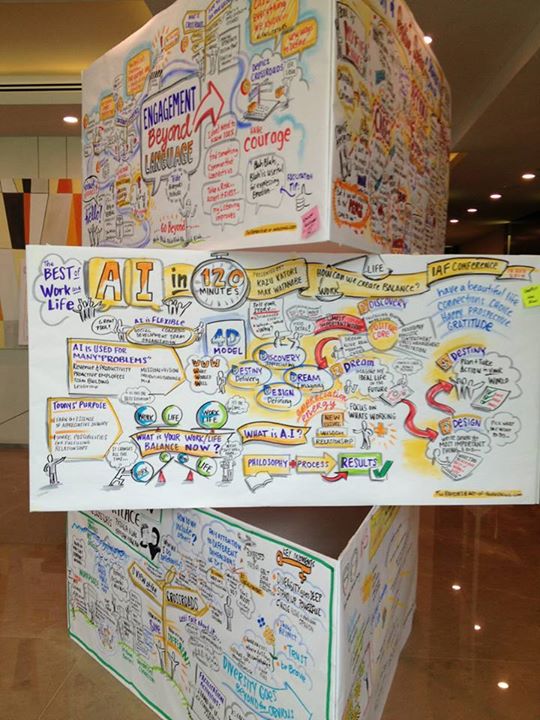
Foam core tower example at the 17th IAF Asia Conference. Courtesy of Brenda Tan & Wendy Wong.
4. Summary Graphic Recording
Have blank sticky notes next to each graphic recording and encourage people to put a sticky note on what resonated with them. Over the course of the conference, a summary graphic recording can be built based on what people have marked as important. The summary graphic recording might be caricatures of each person and their “ah-ha moment,” or a visual summary of the important points. It serves as a powerful take-away, especially at multi-day events.

5. Guided Walk Through
Get people on their feet! If the meeting is 20-30 people, a guided walk through of the graphic recordings with the whole group is an opportunity for collective reflection. Any corrections to the graphic recordings are discussed as a group and it becomes a great way to wrap up a day of good work.
Bonus #6. Don’t Hide Away
Finally, don’t hide the graphic recordings in a dark corner or keep them rolled up and tucked away. Just because participants have a photo of the graphic recordings on their phone, doesn’t mean they’ll look at it or discuss key points with colleagues.
By displaying the graphic recordings, you’re showing participants that their words and thoughts are valued and you’re encouraging people to review and discuss the content. This creates a safe environment to share ideas and conflicting opinions.

For more tips and inspiration on graphic recording, visit Drawing Out Ideas!
- Tanya Gadsby's blog
- Log in or register to post comments